How To Prepare The Surface For Adhesive Bonding
October 30, 2023 2:43 pm Leave your thoughts
1. Clean the Surface:
Before applying any adhesive, it is crucial to thoroughly clean the surface. Any contaminants such as dust, grease, oil, or residue can inhibit the adhesive’s ability to bond effectively. Start by using a clean, lint-free cloth to wipe away any loose dirt or debris. Then, use an appropriate solvent or cleaner recommended by the adhesive manufacturer to remove any remaining contaminants. Be sure to follow the manufacturer’s guidelines and safety precautions when using solvents.
2. Remove Existing Coatings or Paint:
If the surface to be bonded has an existing coating or paint, it is important to remove it before applying the adhesive. This can be done using sandpaper, a wire brush, or a chemical paint stripper, depending on the type of coating. The goal is to create a clean and bare surface free of any barriers that may prevent the adhesive from making direct contact with the substrate.
3. Roughen the Surface:
In order to increase the surface area for better adhesion, it is often necessary to roughen the surface. This can be done using sandpaper, a wire brush, or abrasive blasting techniques. The degree of roughness required will depend on the specific adhesive and materials being bonded. It is important to follow the adhesive manufacturer’s recommendations for the appropriate level of surface roughness.
4. De-grease the Surface:
Even if the surface appears clean, it is important to ensure that it is free from any traces of grease or oil. These substances can interfere with the adhesive bond and compromise its strength. Use a suitable degreasing agent or solvent to remove any grease or oil from the surface. Take care to thoroughly rinse and dry the surface after de-greasing.
5. Prime the Surface (if necessary):
Some materials, such as certain types of plastics or metals, may require a primer to enhance the adhesion of the adhesive. A primer acts as a coupling agent between the adhesive and the substrate, improving the bond strength. Check with the adhesive manufacturer for specific primer recommendations based on the materials you are bonding. Apply the primer according to the manufacturer’s instructions and allow it to dry completely before applying the adhesive.
6. Consider Surface Activation:
In some cases, surface activation techniques may be necessary to further improve the adhesive bond. This can include processes such as plasma treatment, corona treatment, or flame treatment. These techniques modify the surface energy of the material, making it more receptive to adhesive bonding. Surface activation is particularly useful for bonding materials with low surface energy, such as certain plastics.
7. Apply the Adhesive:
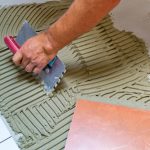
Once the surface is properly prepared, it is time to apply the adhesive. Follow the adhesive manufacturer’s instructions for application and curing times. Be sure to apply the adhesive evenly and in the recommended thickness to ensure a strong and uniform bond. It is also important to consider factors such as temperature, humidity, and pressure during the adhesive application process, as they can affect the bond strength.
Summary
In conclusion, proper surface preparation is crucial for achieving a successful adhesive bonding. By following the steps outlined above, you can ensure that the surface is clean, free from contaminants, and optimally prepared for bonding. Taking the time to properly prepare the surface will result in a strong and durable adhesive bond that can withstand the demands of your application.
Need a Plastic Fabrication Company in Orem, UT?
Categorised in: Tips
This post was written by admin
